Continue from part 1, we need to import the captured reference image for the deployment later.


*If you tick the box below, it will move your captured image instead of copying, it's your choice.


Now you have already imported the captured reference image. Next, you'll need to create a new task sequence to perform the deployment.


You have just created a task sequence for the deployment. Next, you will need to modify some of the rules in Deployment Share to make the deployment simpler.


Please copy the rules below and replace the existing rules. Click Edit Bootstrap.ini
*You might want to modify the red coloured rules
[Settings]
Priority=Default
Properties=MyCustomProperty
[Default]
OSInstall=YES
SkipAdminPassword=YES
SkipApplications=YES
SkipAppsOnUpgrade=YES
SkipBDDWelcome=YES
SkipBitLocker=YES
SkipCapture=YES
SkipComputerName=NO
SkipComputerBackup=NO
ComputerBackupLocation=AUTO
SkipDeploymentType=NO
SkipDomainMembership=YES
JoinDomain=TESTING
DomainAdmin=Administrator
DomainAdminDomain=TESTING
DomainAdminPassword=P@ssw0rd
SkipFinalSummary=NO
SkipLocaleSelection=YES
KeyboardLocale=en-US
UserLocale=en-US
UILanguage=en-US
SkipPackageDisplay=YES
SkipProductKey=YES
SkipSummary=NO
SkipTaskSequence=NO
SkipTimeZone=YES
TimeZone=215
TimeZoneName=Singapore Standard Time
SkipUserData=NO
UserDataLocation=AUTO

*You might want to modify the red coloured rules
[Settings]
Priority=Default
[Default]
DeployRoot=\\MDT\DeploymentShare$
UserID=Administrator
UserDomain=TESTING
UserPassword=P@ssw0rd
KeyboardLocale=en-US
SkipBDDWelcome=YES
After you completed the modification, remember to update the Deployment Share.
Right click on Deployment Share annd select Update Deployment Share


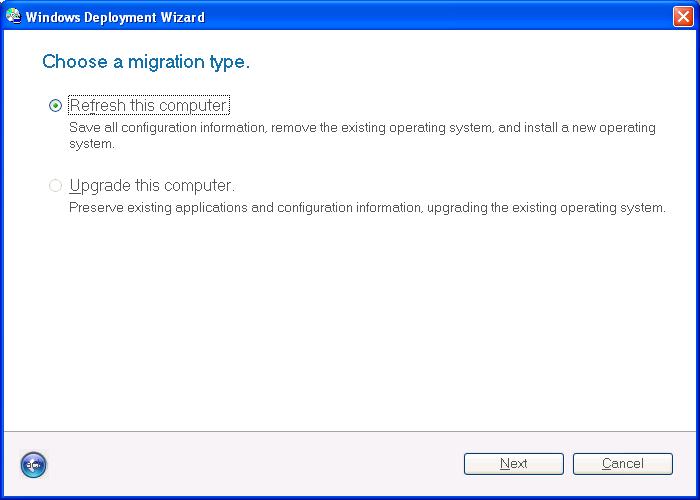
You have done all the necessary in the MDT side. Next, you'll need to run the LiteTouch.wsf script on the XP machine that you wish to migrate to Windows 7.


As you can see, the picture in My Picture and the Paint shortcut were migrated too. This shows that the migration and USMT is working fine. And finally, this comes to the end of XP to Windows 7 Migration.
Hi, I had problem deploying Win 7 OS to Dell Optiplex 980 machine using SCCM 2007 R2. It able to pxe boot. But when it comes to a screen of "Prepare Network Connection" the Win 7 Restart and pxe boot again. After that it failed.
ReplyDeleteYou need to check some of the logs in sccm in order to do the troubleshooting.
ReplyDeleteHi, in refresh scenario with MDT 2010 Updated 1 iam facing problem regarding user data. It is not restoring user data which is in C: drive.
ReplyDeleteHi Techie, what OS are you migrating from and migrating to?
ReplyDeleteFrom Windows XP SP3 x86 to Windows 7 Proffessionalx86
ReplyDelete1. Did you follow the Bootstrap.ini settings above?
ReplyDelete2. What parameter u entered for UserDataLocation?
Dear Hau,
ReplyDeleteThanks for helping me. I am resetuping testing enviroment if i got any problem i will take help from you. I have one question how much free space should be their in c: drive when deploying windows 7 enterprise x86 with MDT 2010 Updated 1 in refresh scenario.
Hi Hau, Do you have windows 7 deployment risk assessement documents and project charter.
ReplyDeleteI think this will help you, http://deployment.xtremeconsulting.com/2009/11/20/understanding-usmt-with-mdt-2010/
ReplyDeleteSecond question, I don't have the documents, sorry :)
we are getting below error while migarting from windows xp sp3 to wiZTI ERROR - Unhandled error returned by LTIApply: (-2147024832 0x80070040)and
ReplyDeletefailed to run the action apply windows pe the specified network path is no longer available.
Check your bootstrap.ini
Delete[Default]
DeployRoot=\\YOURSERVERNAME\DeploymentShare$
make sure this path exisits.
it's there same path... i have checked the again...
ReplyDeleteis that path exisits? Can you connect to the path manually? Is the path being shared as DeploymentShare$?
DeleteVery informative post for me as I am always looking for new content that can help me and my knowledge grow better.
ReplyDeletewindows 7 migration
I am jovial you take pride in what you write. It makes you stand way out from many other writers that can not push high-quality content like you. immigration attorney free consultation
ReplyDeleteYou have done a great job on this article. It’s very readable and highly intelligent. You have even managed to make it understandable and easy to read. You have some real writing talent. Thank you. 먹튀검증
ReplyDeleteThanks for taking the time to discuss this, I feel strongly about it and love learning more on this topic. If possible, as you gain expertise, would you mind updating your blog with extra information? It is extremely helpful for me. 토토사이트
ReplyDeleteIt is my first visit to your blog, and I am very impressed with the articles that you serve. Give adequate knowledge for me. Thank you for sharing useful material. I will be back for the more great post. 파워볼사이트
ReplyDeleteFriend, this web site might be fabolous, i just like it. 대전건마
ReplyDeleteAt Inovi, we’re committed to achieving the highest success rates while providing personalized care to our patients. Our Houston location offers expert care and is home to our state-of-the-art embryology lab. try here
ReplyDeleteWith liposuction, the surgeon can remove stubborn fat deposits, improve your physical appearance by using contouring procedures to give you pleasing curves in all the right places. removal of fat cells
ReplyDeleteI should give scarcely that its influencing! The blog is edifying other than very make influencing entitys. Lipiflow treatment in delhi
ReplyDeletewow this affecting regardless ,I love your enter offering little appreciation to astonishing pics might be part personss controlling connection being defrent mind full scale poeple , https://www.buyyoutubeviewsindia.in/youtube-marketing/
ReplyDeleteI learn some new stuff from it too, thanks for sharing your information. 온라인바둑이
ReplyDeleteIt proved to be Very helpful to me and I am sure to all the commentators here! 온라인바둑이
ReplyDeleteI am very happy to discover your post as it will become on top in my collection of favorite blogs to visit. textbook answers
ReplyDeleteTook me time to read all the comments, but I really enjoyed the article. It proved to be Very helpful to me and I am sure to all the commenters here! It’s always nice when you can not only be informed, but also entertained! visa india online
ReplyDeleteYou make so many great points here that I read your article a couple of times. Your views are in accordance with my own for the most part. This is great content for your readers. investigación de infidelidades
ReplyDeleteYour work is truly appreciated round the clock and the globe. It is incredibly a comprehensive and helpful blog. 토토사이트
ReplyDeleteI have been searching for this kind of information for the past week and hardly found it. This is such a brilliant post. I just want to point out that the Myanmar evisa is now open, so if you want to know what the Myanmar e-Visa Government Fee is, here is a wonderful information site where you can do so.
ReplyDelete
ReplyDeleteWonderful blog . Keep writing an important blog on this topic , What is the time duration of a Kenya transit visa ? The time duration of a Kenya transit visa is usually less than 3 days or 72 hours.
I appreciate your efforts. Thank you and I have never read these types of beautiful articles. We are the one who are listed in the top digital marketing specialist . If You want to become successful in digital marketing . We promise you that we will Help You Until you can not become successful.
ReplyDeleteThank you very much for this important blog. I would like to know more about this topic. Indian e visas are one of the most relevant ways to get an indian visa without meeting any embassy.
ReplyDelete627557879B
ReplyDeleteTakipçi Satın Al
YT Abone Hilesi
TT Beğeni Hilesi